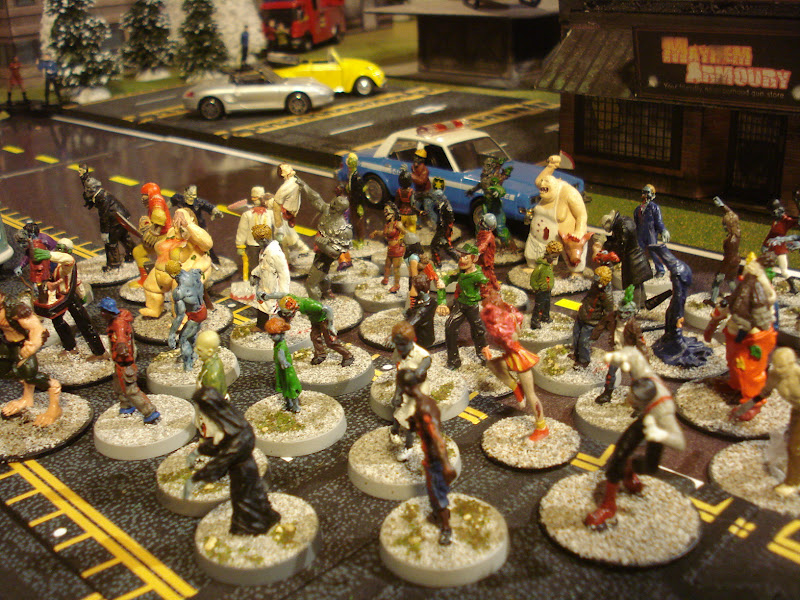
Sunday, March 4, 2012

Paper Buildings Tutorial

Well here we go!  My insane micro scale terrain project is developing legs fast.  I've set up a file sharing account on box.com where I will post my paper terrain as I finish it.  As of now I just posted my first building and a foundation file and it can be found here: http://www.box.com/s/lqcylf4l6xk5x31tk9o8  My priority is to get a bunch of simpler and easier stuff up and running first and then move on to the trickier stuff.
I am still in a learning curve on the creation end of this project, so the terrain will improve a lot as we go along.  For now this is simple and easy to build.
While I am new to creating this stuff from the ground up, I am not new to paper terrain. I've built a ton of this stuff, with fair success and have had quite a few people ask me how the hell I can build so much stuff so fast.  I thought this might be a good time to post a tutorial for anyone interested. Now, that being said, if you want to see the RIGHT way to build this stuff in all its glory, you should go to Vampifans blog!  But if you are like me, more of a dark side of the force type, (faster, easier) than this is the way to approach it!  With me, it is always about mass effect.  Anyway, here's the scoop!
Oh, and VERY IMPORTANT!  Please read the first step about printing very carefully.  And pay attention to the glue in step 3.

First off, with any of the files you get from myself, and most other sources as well, it is very important to print with these settings from the PDF file.  If page scaling is turned on then the printed dimensions won't jive.  This is really a problem if doing an urban setting with city block style streets.  For stand alone structures it is not so important.  I recommend measuring the printed pieces the first time around to verify that all is well.  You don't want to build a ton of stuff and find out it doesn't work together.  I am building all these with a standard foot print increment of 2"x2" for buildings, and 3"x3" for foundations.  When I start posting larger structures, they will all increase by these increments so it is easy to make city layouts that fit together well.


This is pretty much what all you will need.  Cardstock paper (the heaviest you can feed through your printer), ruler, cutter, markers, and glue.  The glue is crucial, see next step.


Here is my glue of choice.  I have tried everything ever made, and this is hands down the best stuff ever.  Glue sticks suck, and most white glues have too much moisture.  Spray adhesives are great for large tiles but cannot be used for delicate work.  Aleen's makes all sorts of glues, and while many of them will work, this is the bomb.  It will grab and hold itself in place within a few seconds, and be ready to handle quite roughly within minutes.  It is transparent for areas you don't clean up as well.  I generally apply a little bead as you will see later, and then smooth the excess with my finger.

I suppose you are supposed to use a ruler for cutting along the lines.  In practice however, I generally do not use one except for certain crucial cuts.  I have found with a little practice I can free hand cut very accurately, and in only a fraction of the time it takes to line up the bloody ruler.  This is the single biggest time saver for dark side paper model building!  It is huge.  I will use a ruler on the bottom edge of larger structures sometimes where it sits on the ground to make sure it is very even, but usually I still don't.  I'm stubborn that way.

Here I am breaking the rules with a free hand cut.  Normally my other hand would be close by to steady the paper but I had to hold the camera.

Cut out the outline of the entire building, including the fold over tabs.  Learn how much pressure is required to cut all the way through the first time around and try to do so.  Coming back and re-cutting is usually harder to do, and wastes time.

The next step is to lightly score the interior fold lines.  With a little practice you will learn how hard to score the paper.  If you push down too hard you will have very wide fold lines, or even cut through.  This is just practice.  It is best to press too lightly as even a very light score will usually allow a good fold.  B sure to score the lines between the white fold over tabs and the building as well.

Now it is time to pre-fold all the sections.  Folding large sections is easy, and it is a bit trickier when you ave very small tabs like shown.  Fold them all the way over (overbend) and then let them come back a little.

Here is my building cut out, and pre-folded.

Here comes a super important step for making good looking buildings.  Take the extra 10 seconds to black line all the visible edges of your model, it is well worth it.  Once it is all folded and glued, there are always some white lines that manage to peak out, and this will keep it to a minimum.  While I don't go nuts with this and go back to line every little crevice, I have found that with the basic edging it produces good results quickly.

Be sure to black line the folded edges like I am doing here as well.  These joints are some of the worst about showing white after it is folded.  You can use other color pens for different building colors as well, but black is a good standard that works with most anything.
We are ready to glue.  I just apply a sporadic bead like this.  I generally choose the longest structural glue point for the first glue step and let that set up before going back to glue everything else.  It is usually too hard to glue it all up at once, and this glue grabs fast so you can get in trouble if you get greedy.

After applying the glue, I smooth it out with my finger.  Keep a rag or paper towel handle to wipe your finger before handling the model afterwards.  I like to make sure that I smooth the glue all the way to the edge that will mate with the other piece of paper.

With buildings of this small size, I have found that it is easiest to accordion the building flat on the table and firmly press it down along the seam several times.  This makes it easy to line up and allows you to apply a lot of pressure.  However, do NOT leave it in this position too long or some glue that seeps into the building could take hold and glue the inside!

As soon as the glue grabs and is holding well (with this glue it is just a few seconds) slightly pop it apart as shown and let it sit for a few minutes while you work on something else.  You do not want to open it up all the way yet because that will put stress on the freshly glued seam.  I like to build several things at once so I can set stuff aside for a couple of minutes and stay busy.

So while we wait for that seam to really get some strength, I will get the foundation ready.  First I cut out the outside and inside squares.

Then I cut through the corner tab joints.  Cut these through so they can fold up.

Before folding, you should score between the tabs and the graphic.  Now strictly speaking, what I am showing here is wrong.  In order to bend these tabs upwards, the correct score would be on the bottom of the piece.  In order to do that I have found it is easiest to punch a couple of slits from the top side and then use those as a guide to make your scores from the back side.  However, since we are using the dark side of the force here, I am simply scoring them from the top.  While this is not optimum, in this particular situation it gives enough relief for a decent bend, and this location is not critical because it will all be inside the building.  All the score is doing is guiding your bend.  Doing this my way saves a bunch of time.

Here is the cut and folded foundation piece.

But we still need to black line!  On these, you just need to do the outer edge.  All the tabs will be hidden inside the building.

Sorry for the horrible photo.  Now we grab our building and apply a bead of glue to the three roof tabs.
Then smooth out the glue.

Then carefully shove it in place.  The thing to watch here is that you do not push the roof too far inside the building.  If you do (and you will), just grab your cutter blade and quickly pop it back up and align it again.  A little practice will make this easy.  When the roof is in place, gently press the wall and roof edges together from all four sides for a few seconds until it grabs.

The one occasional use I do have for the ruler is to reach down inside deep structures to push a fold tab against a wall.  Once again, be gentle here.

Here is one of those darned white lines that shows up against a dark background after making a fold.  If they are bad enough I get out a smaller tipped marker and give it a swipe.

While not perfect, it does look a lot better.

Now all you have to do is put a bead of glue around the fold tabs on the foundation ad pop your building on it.  You can reach in and carefully press them together, but often I don't even bother.  Do pay attention that the building foot print is sitting square with the foundation.

And there you go, a brand new building for your table!  Rinse and repeat.  My total hands on time putting this building together was around 5 minutes.  When you first start out, it will probably take you closer to 20, but with a little practice these things can go together really fast if you follow the ways of the dark side.

Saturday, March 3, 2012

Little Bitty Buildings

A couple of posts back I mentioned that I was starting to create some of my own card stock building designs for 6 to 10mm scale.  I have several things in the works including some parking lots and streets, which there is a serious demand for.  I've yet to find anything comprehensive in that department so I am working more on that than actual buildings to start with. 

That being said, I am still mucking about with the street layouts and scale so they are not ready yet, but I did work on some buildings just to get my feet wet and try to learn what the heck I'm doing.  Gee wiz, I'm not making much sense here am I?  Anyway, here is my very first building that I scaled and printed and built last week.  It is not perfect, but it is a one piece just under 6" tall and assembles quite well.  It is very easy to build as well and is good for beginners.

While we are at it, can any of you guys give me some leads where I can post files for free?  (I'm hopelessly primitive in this area)  I could then start to upload the city pieces in .pdf format as I finish them for any of you who would like to build them. In the meantime you can email me at sturm_flieger@yahoo.com if you want files.
It is sort of a marble red apartment type building suitable for just about any modern or sci-fi table.

I've pretty much settled for a 2" square footprint for my buildings.  It is important to get this down and match to the streets early on so the city layouts will jive well.  I will probably make a foundation set with sidewalks/easements in the near future as an option for mounting these buildings,

Saturday, February 25, 2012

Captains Log...

It was just a matter of time.  I finally got my grubby little hands on some Star Trek minis and of course I decided the way to break them in was for the Enterprise to investigate a planet in the midst of a Zombie epidemic.  I'm really sorry that I have not had the time to batrep this, but I thought I would throw up a few pics anyway.  Rest assured, there will be many, many more adventures with the crew of the Starship Enterprise in the LTL Universe.  There is nothing so idiotic that I won't find a way to game it.  This was my first Saturday completely off of work in like 4 months and we had a blast.
Herrodadog set up a nice table I think.

The players were from left to right:  Chekov/Herrodadog, Kirk/George, Scottie/Nick, Sulu/Mark, Spock/LTL Dad.  Uhura didn't make the pic but she was played by LTL Mom.  With this crew of pro Zombie players the crew was operating too efficiently.  From now on I am switching to cheetah-fast Dawn of the Dead type Zeds as well as some specialty Zombies to make these players sweat a bit.

The crew beamed down to the surface in a random location.  Bones stayed aboard the ship.

Because of some Federation treaty malarky, the crew had to beam down without phasers so the first job was to scramble for some weapons.  It was also determined that the epidemic was contagious and Bones informed the crew they could not return to the ship without stopping the epidemic first.

About this time Sulu confirms that Zeds are not a friendly species.

So off to loot some buildings and search for answers.


The crew stays together and plows through the building fighting off Zeds at every turn.


On one of the upper floors the crew meats a group of survivors who agree to join the crew for the duration of the mission.

So back out on the streets the crew makes its way to the industrial sector.  Sulu went down but luckily regained consciousness.  Bones was brought down shortly beforehand when the crew had another close call.  With the doctor around, the chances of a crew member surviving a bad combat increase greatly.


Starting to attract attention while scampering across the parking lot.

Quick discussion on strategy while catching their breath from the last Zed attacks.

The crew decides to enter the warehouse through the upper story window.

The only trouble is that they discover there is no firestep inside the building and after some discussion we decide not to take the chance of getting hurt while dropping to the ground.  Not being able to fast move could prove disastrous.  Meanwhile, Zeds have been closing in.


So they are off to find another way in.

Carefully trying to avoid detection.

So of course a barking dog decides to roll up bringing Zeds and attracting attention.

The rather large group finally gets into the warehouse.  By the way, they picked up a couple more survivors along the way.

The small army clears the warehouse.

And discovers a mysterious control center.  Spock seems to think it could be key to this epidemic.  There are several choices of controls to monkey with, and Scottie doesn't pass enough dice to figure it all out, so the crew finally decides to just start pushing buttons.

Zeds are still milling about all over town.

One of the controls opened a secret tunnel and the crew goes down and makes there way underground.  Since I don't have a tunnel system, just use your imagination.

The crew evacuated just in time as the warehouse is now filling up with Zeds.

Holy Moly!  When Kirk pokes his head out the tunnel he sees that the streets are now covered with hordes of Zeds.  It turns out that one of the controls released several shipping containers full of these hungry zombies!

This is simply turning out to be a very bad situation.  Zeds are crawling everywhere, and the tunnel is blocked by a fairly large crowd of Zeds back in the warehouse as well.

About this time Kirk decides to abort the mission and call to be beamed up to the ship.  Since Bones is now on the surface with the rest of the desperate crew he decides that it wouldn't be so bad to take their chances with the contagion after all!  So the first mission of the Enterprise in the LTL Universe is a failure and Kirk will have to submit a damned depressing Captains log entry.  But on the bright side nobody died!  Oh, and take a look at that beautiful VW Beetle.  I've been dieing to get that puppy on a table for some time so the mission was a total success for me!  

Friday, February 24, 2012

A New LTL City

I've finally started on a project that I have been wanting to do for a couple of years now.  After acquiring some Mech Warrior type stuff I decided that the first thing to do is get the scenery down.  One of these days I will get off my horrible work schedule and start the bat reps again, and that means the terrain needs to be spiff.
I Googled for these puppies and found some good links to some nice little building pdf files that several guys have generously made available.  They are roughly 6mm scale and look quite nice.  Best of all, they are small, don't take a lot of room, and are easy to build.  What else could you ask for?
When Herrodadog comes back from his work trip we plan to pit my alien mech cultures against his modern microarmor and see if they can save the Earth!
Here is my work station with the only necessary materials.  Ruler, blade, markers, and glue.  Oh, and a cutting mat is really nice as well.

With the crazy cost of resin buildings, and the fact that I can't paint buildings worth a damn, this is a no brainer solution for me.

All the buildings and road pieces in these pictures took me about 3 hours to print, cut out, and build.  I can't even imagine what this would have cost in resin, and how long it would have taken.  So if you need small scale terrain, once again, paper to the rescue.

Sunday, January 29, 2012

Italians to the Rescue!

Yes, I did say Italians, and yes, I'm talking about WW2!  My work is still keeping me away from my normal gaming levels so to keep me going I have been sneaking in quite a bit of board gaming the past couple of months.  I had a chance to grab both the Europe 1940 and Pacific 1940 offerings from the Axis and Allies board games very cheap, so I did it finally.  These two games can be put together to play the entire war on all fronts.  We are actually having a lot of fun with this game.  It is quite easy to play, but the big strategic decisions are real brain breakers.  I highly recommend these games.  Anyway, back to the Italians!  During the course of my Europe game with Herrodadog, my Italians went nuts and ran roughshod over everyone.  At first I was thinking "what the hey!?!?", but in reflection, if you really think about it, the only reason they had a troubled start in N. Africa was lousy leadership and organization.  They were definitely poised to be in the driver seat otherwise.  So in this alternate universe they can shine.  Here's some shots from our game so far.  The Yanks have just entered the war and had their first taste of the action.
The A&A game board is rather appealing to the eye and what I like is the little miniature tokens are actually different for each nation for the most part.

Early on my Germans grabbed up all the stuff they were supposed to, and as a bonus they managed to pull off a successful operation Sealion!  I almost miscalculated, but barely got England in a real nail biter.  My Luftwaffe actually had some fighter support by the way.  So at this point the Germans were looking pretty good.

But soon afterwards we launched Barbarossa and dove into the USSR where things didn't move so fast, or so well.  I think I played this too conservatively and allowed the Russkies to get a solid front together.  I took a lot of my resource to grab England, and I was afraid of stretching too thinly into the Russian steppe.  Finally, one of my major battles very strongly resembled Kursk where I got my arse seriously handed to me and lost a bunch of Panzer Divsions.  OUCH!  So the end result is a stalemate in the East.

While all this was going on, the Italians made an early strike at Egypt shutting down the Suez canal and they never looked back.  They overran all of Africa removing all traces of the UK from the continent.  I addition they grabbed Greece and all the islands in the Mediterranean including Malta.  Italian production levels are now quite serious and they have a relatively secure base of operations to work from.

This translates to the Italians being able to go out and cause some mischief elsewhere.  Here we can see them driving through the Middle East and threatening the Russian oil fields from the South.  This will be a great boon for the Germans as now the Soviets must expend resources to defend the second front and thin their defenses in the North.

The Italians also managed to grab Gibralter from a napping Herrodadog which was really driving him nuts.  So now instead of the Yanks entering the war and making an easy landing in N. Africa, they had to fight their way into Gibralter before the Italians dug in too well.  The Yanks managed to take it back, but it was very costly.  In addition, the Italians have a tremendous amount of very mobile air assets available to counterattack and make another try to get it back quickly.  If they manage to take it back, things will look very bleak for the Allies indeed.

All UK assets and production are now coming from Canada and it will be a slow process of getting back into the war.